How to Get the Best Results from Portfolio Booklet Printing
Why Portfolio Booklet Printing Still Matters
I have been working with printed portfolios for over a decade, and one thing has not changed. A well-made booklet can open doors that a digital PDF cannot. When you hand someone a physical piece, they feel the paper, notice the binding, and judge the work inside. That moment matters. Whether you are a photographer, an architect, a graphic designer, or a student applying for a residency, your portfolio booklet is often the first tangible proof of your skill. Getting it right means understanding the process from file to finish.
In Lancaster, where I run a small print consultancy, I see people bring in layouts that look great on screen but fall apart on coated paper. Others spend too much on perfect binding when saddle stitching would serve them better. The key is knowing what each choice costs in quality, time, and money. That is what this article covers: the practical decisions behind portfolio booklet printing, and how to avoid common mistakes.
Start with the Right Software
Before you send anything to a printer, you need to build your file properly. Most designers I work with use Adobe InDesign because it handles multi-page documents, bleeds, and colour profiles natively. If you are just starting out, Canva is a decent alternative for simple layouts, but be careful with its export settings. Canva sometimes shifts colours or crops margins unpredictably. I have had to rebuild several Canva files before they would run on our digital printing press.
For a portfolio, set your document to the final trim size plus 3mm bleed on each edge. If you are printing an A4 booklet, the page size in InDesign should be 210mm by 297mm, with the bleed extending to 216mm by 303mm. This extra margin ensures that when the guillotine trims the stack, no white sliver appears at the edge of a full-bleed image. For larger formats like SRA3, the same principle applies, just with bigger numbers.
Binding: Choose What Fits Your Use
The binding method affects how your booklet opens, lies flat, and lasts. For portfolios under 48 pages, saddle stitching is my go-to. It is cheap, fast, and opens completely flat. Photographers like it because a double-page spread looks seamless. The downsides are that you cannot print on the spine, and thick booklets can bulge at the fold.
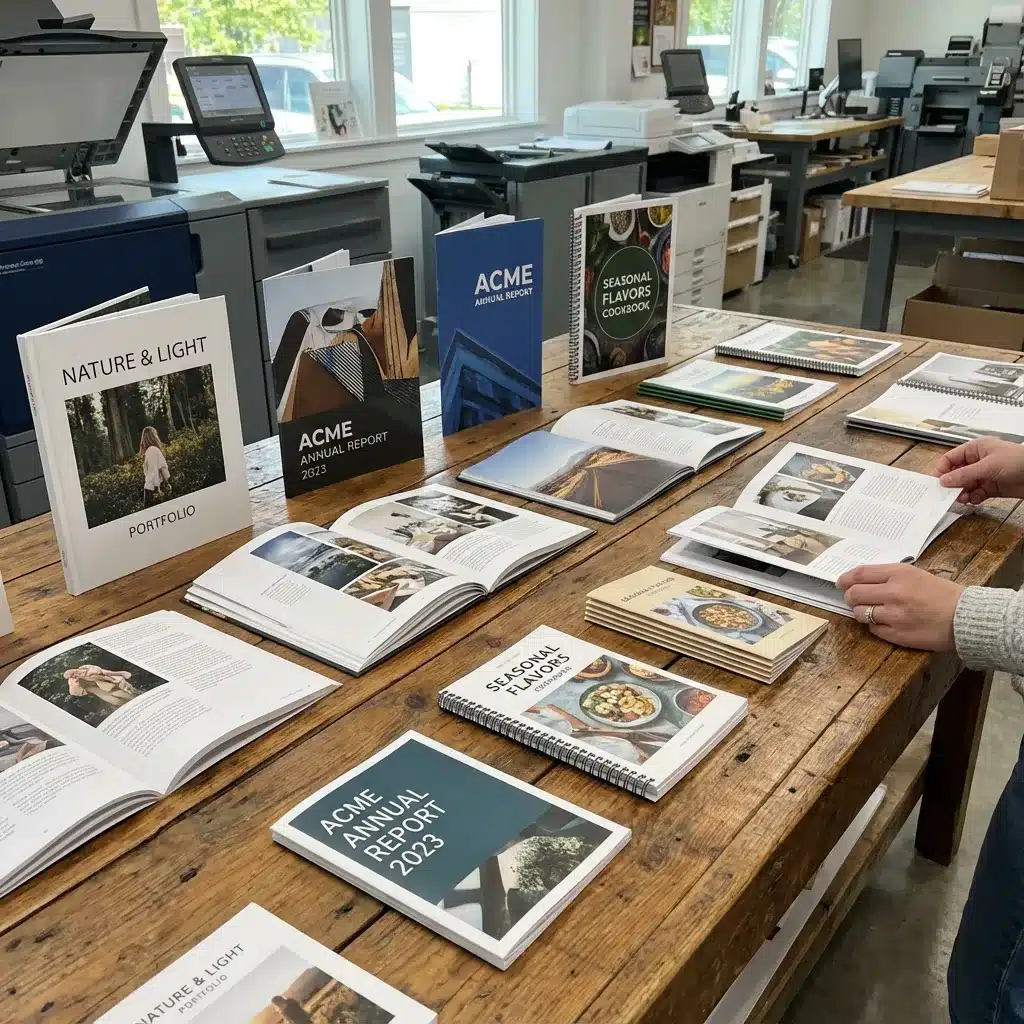
For thicker booklets, perfect binding gives a square spine that looks professional on a shelf. But perfect binding does not open flat. You lose a few millimetres of the inner margin near the gutter. If you have a full-bleed image crossing the spine, the text or subject may disappear into the crease. I always tell clients to shift critical content away from the gutter by at least 5mm when using perfect binding.
Spiral binding is another option, especially for workbooks or process portfolios where pages need to turn 360 degrees. It is less common for finished portfolios, but some architects and artists prefer it because you can swap pages later. The trade-off is a less polished look and the need for a hole-punch margin.
Portfolio binding is a term you will hear at trade shows. It usually refers to a lay-flat binding with a cloth hinge. It looks elegant but costs more and is harder to find locally. For most people, saddle stitching or perfect binding is the practical choice.
Paper: Coated vs. Uncoated
Paper choice changes how your images read. Coated paper, like a gloss finish or matt lamination, makes colours pop and sharpens detail. Gloss paper is reflective, which can be distracting under bright lights. Matt lamination reduces glare and feels smoother to the touch. I usually recommend a silk-coated stock for portfolios: it sits between gloss and matt, giving good colour saturation without the shine.
Uncoated paper feels more natural and is easier to write on with a pen. That matters if you want reviewers to scribble notes in the margin. But uncoated paper absorbs more ink, so your images look less vibrant. For a portfolio, I prefer coated for the main body and uncoated for a cover that you want to handwrite a note on.
Short-Run Printing: Digital vs. Offset
Most portfolio booklet printing runs are small: 10, 25, maybe 100 copies. That is where digital printing shines. Digital presses have no setup cost, so you can print one copy at a time. The quality has improved massively in the last five years. Modern digital presses can match offset for most jobs, especially on coated paper.
Offset printing is still better for very large runs or when you need a specific Pantone colour across a corporate identity. But for a portfolio, offset costs more per copy at low volumes because of plate making and makeready. I have seen clients pay double for offset on a run of 50 booklets when digital would have looked identical. Unless you need spot colours or a special finish, stick with digital.

The UK print industry has many digital specialists. In Lancaster, we have a few local shops that handle short-run printing well. Using a local printer means you can check proofs in person and avoid shipping delays. Online services like Moo and Vistaprint are convenient, but their quality varies. I have received Moo booklets with misaligned folds and Vistaprint covers that peeled after a week. A local printer who sees your file before it runs can catch those problems.
Designing for the Finished Size
An A4 booklet is standard for portfolios. It fits in a bag, sits on a desk, and feels substantial. If you want something more compact, A5 works for a leave-behind. But be careful: shrinking an A4 layout to A5 makes text tiny and images lose impact. It is better to redesign for the smaller format.
For full-bleed images, design your spreads on SRA3 sheets. SRA3 is slightly larger than A3 and gives room for trim marks and colour bars. When you print on SRA3 and trim down, you avoid losing content at the edge. I always tell clients to keep critical text at least 10mm inside the trim line, away from the bleed area.
Self-Publishing and Portfolio Booklet Printing
Self-publishing has grown fast, and portfolio booklet printing is part of that trend. Artists and writers use short runs to sell at events or submit to galleries. The same principles apply: choose binding based on page count, pick paper that suits your images, and proofread everything before sending the file. Digital printing makes it affordable to print 25 copies of a 32-page booklet for under a hundred pounds, depending on the finish.
I have worked with a local photographer who wanted to self-publish a collection of Lancaster landscapes. We used uncoated paper for the cover, saddle stitching for the binding, and a matt lamination on the inside pages. The result looked handmade and honest, which matched the subject. That is the kind of judgment a printer with local knowledge can offer.
Practical Tips for a Flawless Finish
Here are a few things I check on every portfolio booklet job:
- Export your layout as a print-ready PDF with crop marks and bleeds. In InDesign, use the PDF/X-1a standard.
- Convert all fonts to outlines or embed them. Missing fonts cause errors at the RIP stage.
- Check that your images are at least 300 dpi at final size. Low-res images look soft on coated paper.
- Ask for a hard proof before the full run. A screen proof shows colours, but a physical proof shows paper texture and binding tension.
- Order one extra copy for your own archive. You will want it later.
When to Use Online Services and When to Go Local
Online services like Moo and Vistaprint work for simple jobs: business cards, postcards, or small booklets with standard finishes. Their templates are easy to use, and turnaround is fast. But for a portfolio booklet, I see too many issues: colour shifts between pages, inconsistent trim, and binding that does not lie flat. If your portfolio represents months of work, it is worth paying a little more for a local printer who will check your file and talk through the options.

In Lancaster, I have access to printers who run digital presses from Heidelberg and Xerox. They know how coated paper behaves on their machines. They can advise on gloss finish versus matt lamination. They will call you if your file has a missing bleed. That kind of service is hard to get from a web form.
One more thing about the UK print industry: it is full of small shops that have been running for decades. They have seen every mistake. They can save you from ordering 500 booklets with a typo on page three. Use their experience.
Final Thoughts
Portfolio booklet printing is not just about putting ink on paper. It is about presenting your work in a way that earns respect. The right binding, paper, and finish tell a story before anyone reads a word. Start with good software, choose a binding that matches your page count, and test your paper choice with a physical sample. If you keep these principles in mind, your portfolio will look professional and feel right in the hand.
Ends · LQX5S54WSR